Today’s #TipTuesday is another one for the newer Dynamics GP users in the community. Recently a user asked me how they could prepare a SmartList for some receivables data they wanted. It turns out they had not utilized SmartLists at all in their day-to-day work yet, despite using Dynamics GP for a few years. It occurred to me how little time we spend training users on being more effective with this valuable tool!
Over the next few weeks, I will post different tips about how to utilize SmartList more effectively!
Terminology
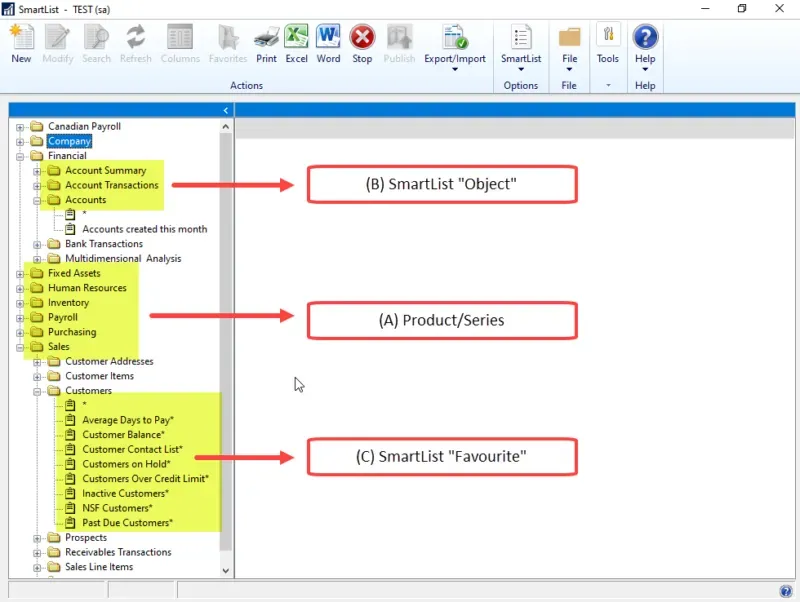
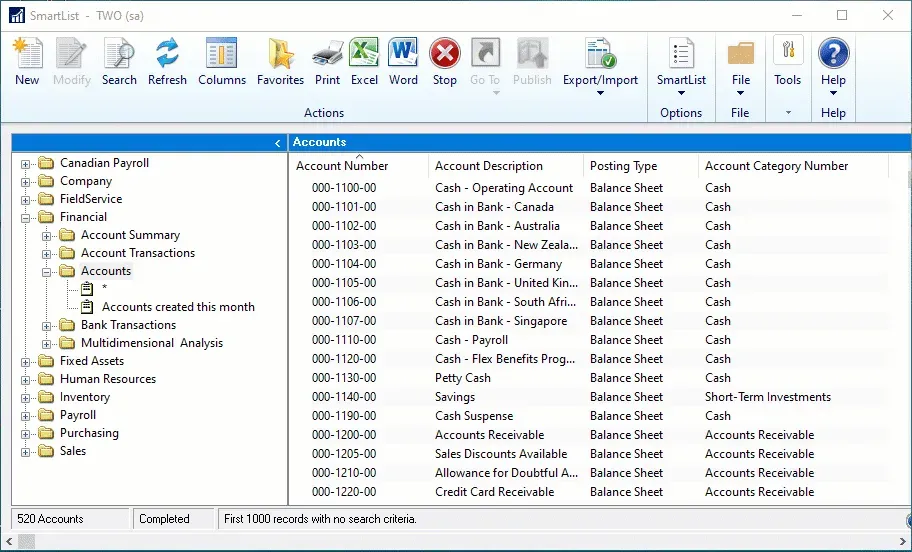
There’s a hierarchy to SmartLists which is Product or Series (A) > SmartList Object (B) > SmartList Favorite (C). In the screenshot below, I have highlighted different elements in my SmartList window to show the difference between the different elements (although they aren’t in order!).
Security
Security is assigned at the “SmartList Object” level, via Security Tasks. Specifically, object access is granted under the following settings in a task:
- Product: SmartList (even if it’s a SmartList Builder-created list)
- Type: SmartList Object
- Series: SmartList Objects
Favorites can be saved with different default audiences (System-wide, Company-wide, User or User Class), to hide or show from others but this is not “security” per se. If a user can see a given SmartList object, they can see any favorites underneath that which are set to a visibility of System, Company, User (if saved under their login) or User Class (if saved by someone in the same user class).
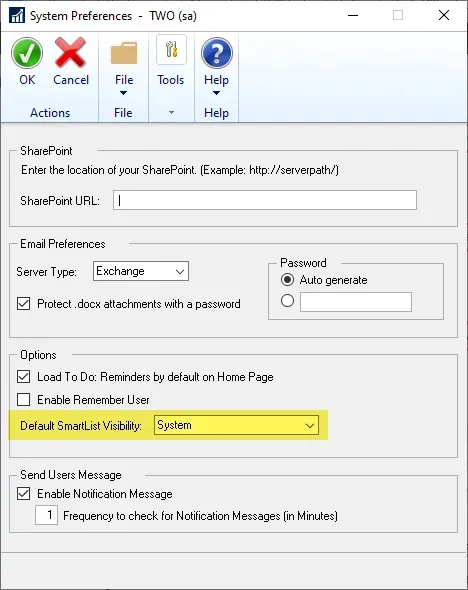
With that access, they would also be able to modify or delete those favorites, which led to a System Preference option in GP 2015 R2 called “Default SmartList Visibility”. I typically recommend that the default be set to User, to reduce the amount of clutter for users. Historically the default was System and in my experience, most users never change that so what ends up happening is the list of favorites gets longer and longer! With the default set to User, any favorite a user saves is then visible to them only (unless they change the default setting).
Basic features of a SmartList
The most basic element of a favorite or list is the ability to easily sort the results by any column. Resizing columns is also very easy to do.
- Sorting: clicking on any column header will sort first A to Z and if clicked again it will sort Z to A.
- Resizing: column widths can be changed in a similar way to Excel, by dragging the divider between the columns or double-clicking on the divider to expand the column to the width of the contents.
Next, are some of the toolbar options. I will not be covering all things in this post, but I do want to show the Go To function, as that is often forgotten about! Once a record is selected within the results of a SmartList, the Go To button becomes enabled. Depending on what object a user is on, the list of items in the Go To will vary (and if it’s a custom-built SmartList object there may not be any if the author didn’t include them).
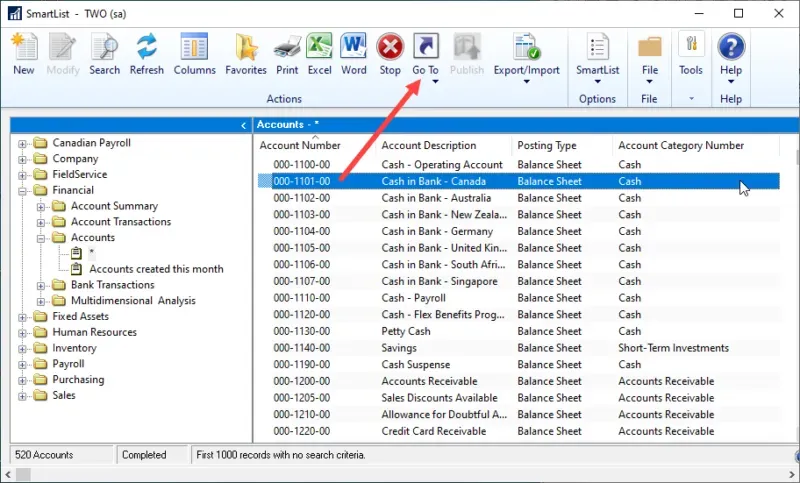
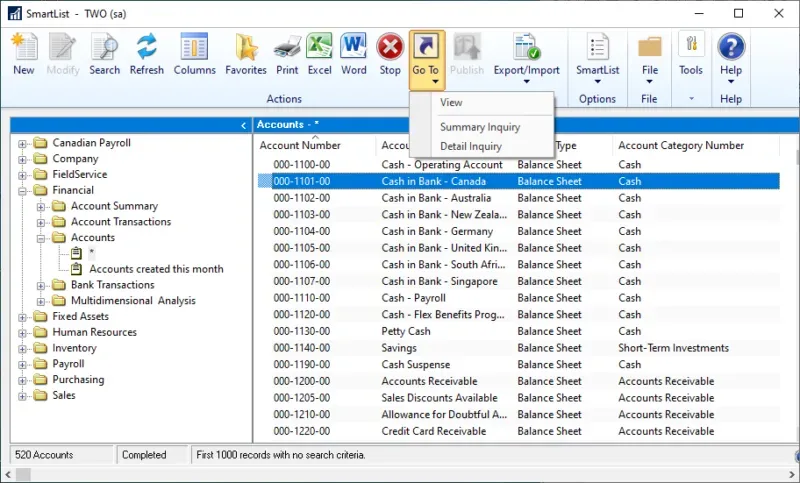
Above, the screenshot shows that I have selected a record in my list, which enables the Go To button (otherwise it is greyed out). Below is the screenshot showing what this particular object has as its option. I am on the Accounts list, which has the Go To options of View, Summary Inquiry or Detail Inquiry. The top option on the Go To is also what a user would get if they double-clicked on a record, in this case, “View” the Account in Account Maintenance.
If no record is selected, the Go To is disabled.
Statuses & Number of Records
At the bottom of the SmartList window are 3 fields:
- The number of records returned (and name of what kind of record it is, for example, “XXXX Accounts”).
- A status, which I will describe below.
- Finally, a field which describes in words what the results contain: First XXX records with.
Regarding the number of records, the “First XXX” is very important. I wrote a post a few months ago about the system SmartList Options window which (among other things) includes a setting for each SmartList Object’s maximum number of records. The default for all objects is 1000 records, but this can be changed for any single SmartList Object individually. That post has the details.
The search criteria part of the bottom row I will cover in a future #TipTuesday post. Today though I will talk about Statuses. There are 3 primary statuses a user may see:
- Exploring – which is what users see when they first click on an object or favorite. The left side of the status bar will count the records as it gets the results.
- Stopped – this is what users see if they either click the Stop button while the SmartList is running or if they open something from the toolbar (like Search) while the SmartList is running.
- Completed – this is when it’s done getting results. See more below on this, as it can also be “done” when it reaches a maximum number of records.
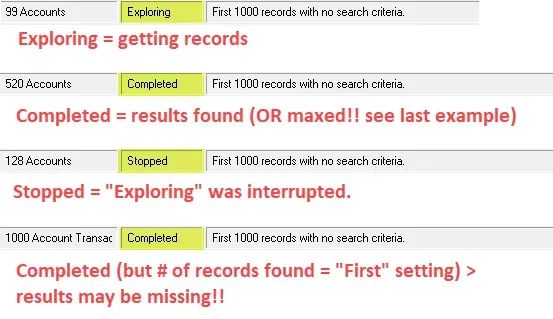
The bottom item on this screenshot is the most important concept for a user to understand. It shows (for those who cannot see the screenshot) a line with the following information:
- 1000 Account Transactions
- Status: Completed
- First 1000 records with no search criteria
I train every user to pay close attention to the number on the left and the right of this status bar. If those 2 numbers are the same, chances are there are missing results. The odds of having only 1000 exactly are slim, in this case (and in most practical scenarios) so if the number of results matches the First xxx number, it is best to change the search criteria.
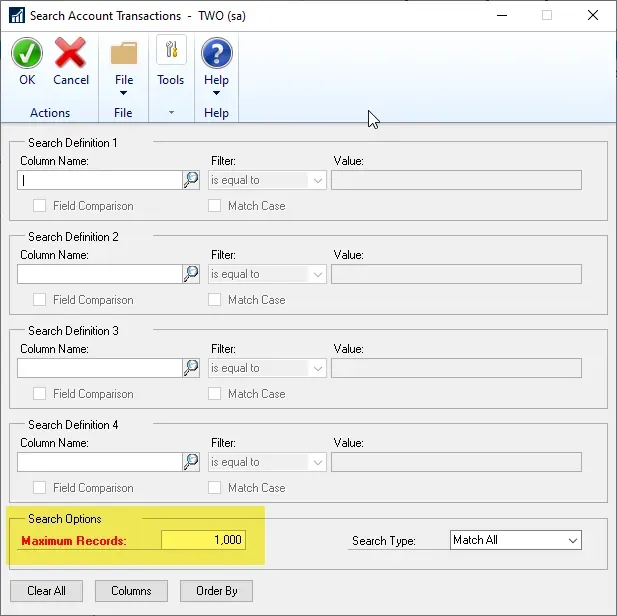
This is a teaser as I am not covering search here (but will in a future post). However, a quick tip I will share (since it is related to this issue): go into Search on the toolbar and users will want to do one of two things:
- Change the number of max records to something higher than what is expected. I use 99999 a lot!
- Set some actual search criteria so that the expected results are less than the max.
That’s all for this post. In the next couple of #TipTuesday posts, I will cover other things like columns, favorites, search and exporting. Stay tuned!