Today’s #TipTuesday is about the SmartList Options window, a hidden gem! The misconception is some of the things I’m describing might require using SmartList Designer or Builder to create new SmartLists. Many useful tweaks can be made without any of those tools.
What is it?
First of all, this window is found on the Administration page > System > SmartList Options. This is a very useful window where we can do all of the following things:
- Set the defaults on every SmartList object in the system, including custom-built SmartLists.
- Set search defaults for Search in SmartList.
- Set a password for modifying favourites.
This window is a System window, not Company-specific or User-specific. What that means is any changes made here will affect that particular SmartList object across every company and for every user. Specifically, this is where the settings are for the “*” default option that is on each SmartList. Nothing in this window will affect existing favorites that are saved. For example: setting the default max records to a higher number won’t update existing saved favourites, but will be the default for new ones.
How to use it
Here is what the SmartList Options window looked like before I made a few changes to the Accounts SmartList object. By default, this list shows 1,000 accounts and 4 fields – Account Number, Description, Posting Type and Category.
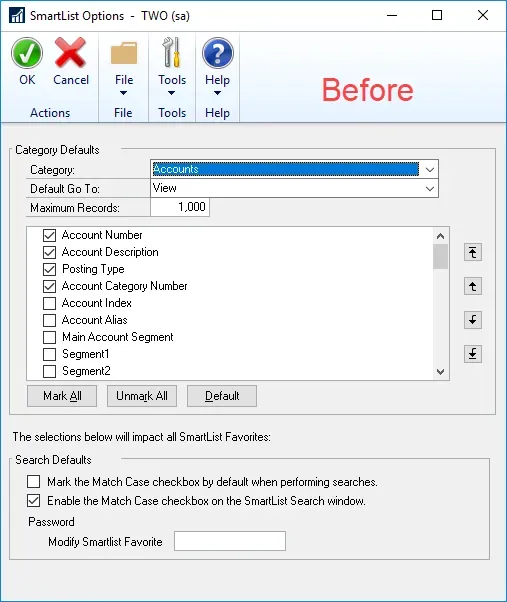
Starting at the top of the window, the Category drop-down list is the list of SmartList objects. A SmartList “object” is the “yellow folder” level of the SmartLists in the list of SmartLists. So, Accounts, Customers, Vendors, Payables Transactions, Account Transactions etc. The level under the object is where users can save “Favorites”.
Start by selecting a SmartList object from the drop-down list. One thing to beware of, the list is (seemingly) in a random order! If there are a lot of custom SmartLists, it may be slightly hard to find them as they don’t appear to be in either order of date created or alphabetical, but they will be there somewhere!
The next drop-down list is the Default Go To option. The out-of-the-box SmartLists have (typically) more than one option on the Go To menu. For Accounts, for instance, the default is View (open the Account Maintenance window) but there are options to open the Summary Inquiry window or the Detail Inquiry window. The default Go-To is the one which is used when a user double-clicks on a record in a set of SmartList results. Users can’t add new Go To’s here, but they can change which one is the default for that particular SmartList object.
The third field on the window is the maximum records setting for this object’s default SmartList. Every default is 1,000 but it’s definable for every single object. Users may want a different default maximum for different SmartList objects. The best number to set will depend on how that object is used across the various company databases, there is one “perfect” value to set this at.
Next in the window are the default fields for the SmartList object. Here I can alter the position, the name, and which fields are visible by default on the * default for the object. Editing the display name is as simple as clicking in the field and typing over the name in the list of fields like in the Columns chooser window in SmartList itself. Clicking on the Default button will reset the object to the default order, name and fields that were out-of-the-box.
The Search options at the bottom of the window are around case sensitivity. The first option is identifying if this SmartList should have the Match Case box ticked by default. The second is whether that choice is enabled at all. The password option – this screenshot is from GP 2016 when this was first added – and it’s about setting a password to control who can modify a SmartList favourite. In GP 2018, this feature was modified to allow for a password at a SmartList favourite level instead of one password for the entire system.
I made a few changes and here’s an example of what it looks like afterwards. I increased the max to 5,000 records, marked a few new fields and moved the Main Account Segment field to the first/left field.
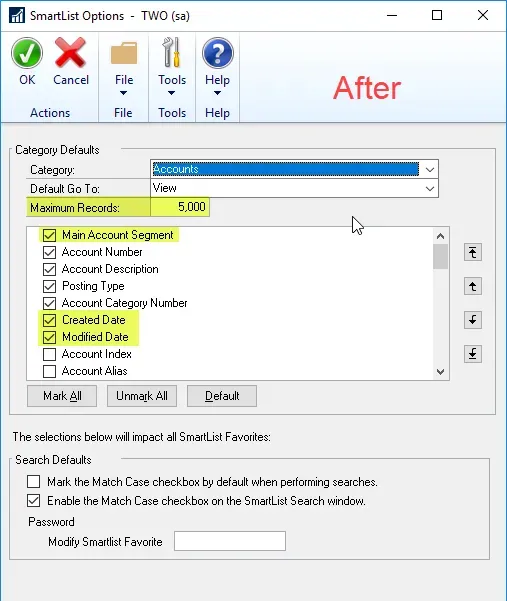
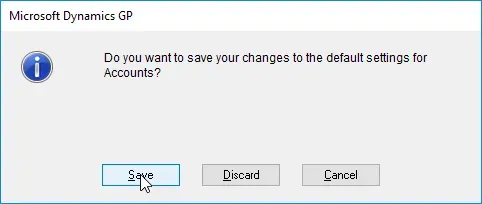
After clicking on the Category drop-down list, I was prompted to save my changes. I could simply change the Category to another SmartList object and save as I go, making changes to multiple SmartLists as I like.
What it looks like in SmartList
Here’s what the Accounts SmartList looks like with my changes, when I select the * default:
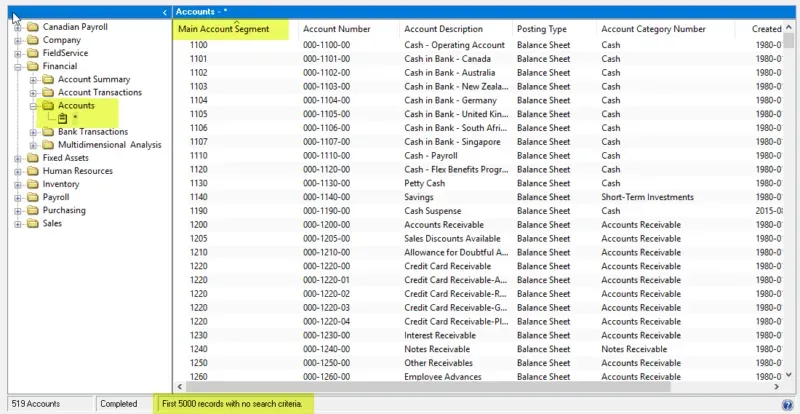
I’ve highlighted the obvious places where the changes I made are visible. My Main Account is now my first column, and my max record is 5,000. By comparison, here is the Customers SmartList where the default max is still 1,000 because I did not modify that particular object.

That’s it for this particular tip. I find this to be a very useful window, especially when adding new smartlists if I want to set a different default maximum number of records. If your organization has SmartList Builder, I would use this to set the column order and Go To’s in the product but for users that don’t have SLB, SmartList Options is a good alternative to manage some of this stuff!