This week’s #TipTuesday is about the navigation pane and some very brief tips on personalizing what I can see.
How to customize it
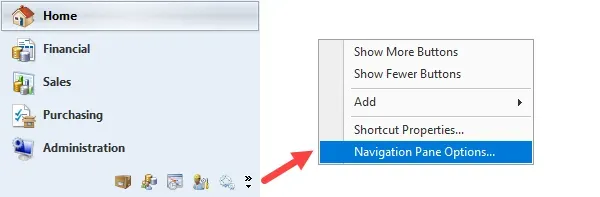
By default, the navigation pane will show 4-5 panes, as pictured below. Depending on what I have installed in my environment, there may be more “panes” I have as icons below that.
I would rather see the full name, not the icons, so I “stretch” my pane to full height so that all panes I want to see are visible. The key here is “all the panes I *want* to see”.
To edit that, click on the tiny drop-down list at the bottom of the navigation pane, and then select Navigation Pane Options from the pop-up menu.
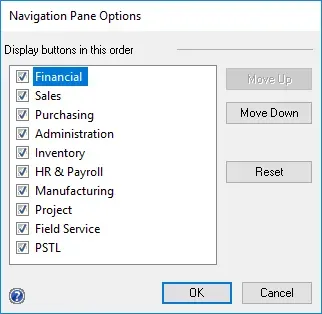
In the next window, Navigation Pane Options, a user can hide/show and re-arrange the navigation panes. What is in this screenshot is the default Dynamics GP installation plus HR/Canadian Payroll, Project Accounting and Professional Services Tools Library.
At work, we use Key2Act Job Cost and GP Power Tools, so there are navigation pane options for those products as well (not pictured, as this is taken from a demo environment at home).
Long story short: uncheck the options that aren’t needed in the Navigation Pane and re-arrange the order as needed. I like having Administration close to the top as I’m there frequently.