I made the rookie mistake of forgetting I left my VM on earlier this week and now I’m out of credits and have to wait another few days to use it again. Drag!
Before that, I had taken some screenshots to demonstrate how to find and use some settings around IP addresses and DNS names. Some of these things have changed since I wrote about my Azure experiences around this time last year, so this is an update when using the new Resource Manager approach to managing VMs.
Public IP Address
I referenced this briefly in my first “More Azure” post a few weeks ago. To access a VM to administer it, install software, configure etc., then admins need to specify a Public IP address for it to access it from outside of the Azure Virtual Network. If admins have a dedicated Azure VM for RDS already, then they may be able to RDP to the VM from an RDS session because they’re on the Azure virtual network at that point. In my setup, this is for demos and testing only, not production and I need to log into the machines from outside Azure.
In a VM, go to All Settings, and select Network Interfaces. Open up the network interface, and select IP Addresses. Under All Settings of that, is this screen where admins can enable a Public IP Address.
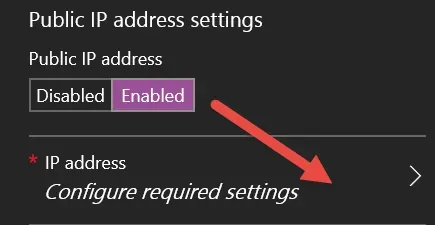
If there isn’t a public IP address created already, click Create New to create one.
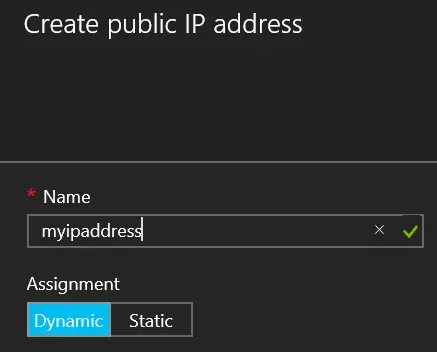
Give the Public IP address a name and determine if it should be Dynamic or Static. Dynamic means of course the IP can change each time the machine is cycled off. Save when done.
DNS Name Labels
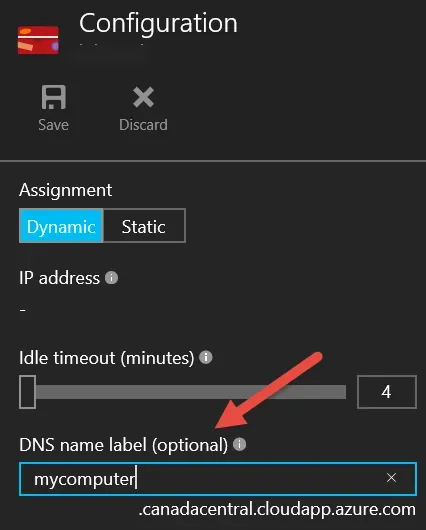
There is another option which I’ve chosen to use on any machines I want to access externally from the Azure network and that is giving the Public IP address a DNS name label. This was done in a different area – under Public IP Addresses. Go into the configuration area of Public IP Addresses, where admins can manage the settings like Dynamic vs. Static, as well as give the DNS Name Label.
The DNS label is appended with a generic suffix for the region, which in my case is Canada Central. Using the DNS label is easy, if the VM is running, simply RDP to that fully qualified name to connect to the machine. Azure DNS refreshes nearly instantly to make this DNS label immediately available, unlike working with DNS for public websites where one may need to wait 24 hours for things to propagate.
The best part is for me, I no longer have to log into Azure, navigate to my VM, and click Connect, as long as the VM is running already! Without the DNS label and a dynamic Public IP, using the Connect button, I’ll get a different connection each time potentially making saving the RDP connection difficult. This, however, eliminates the need to have a static public IP, at least for my needs.