In early May 2016, we saw the introduction of Microsoft Dynamics GP 2016 and the general availability of the first two Canadian Azure data centres in Toronto and Quebec City. That combination gave me a chance to roll up my sleeves again and work with Azure a little more, as I want to ultimately host any of my own Azure machines in Canada, and of course, play with the last version of Dynamics GP!
One year ago now, I wrapped up a series of posts detailing my adventures with Microsoft Azure, learning about how it works, and what the cost looks like over the first few months of activity. The wrap-up post is here, which has the index of the series I wrote. Reading through those, most of what I wrote is useless now!
I hope to write some updated blog articles on what’s changed in Azure since I wrote about things last year. My experience recently has shown me that nearly everything I thought I knew last year, has changed! There is a new portal, which means deploying resources differently, with different terminology, different locations for finding some things etc.
(New) Portal vs. Classic (Old) Portal
Depending on how one logs into the Azure management area, they either go to the old (“classic”) portal or a new (“resource manager”) portal.
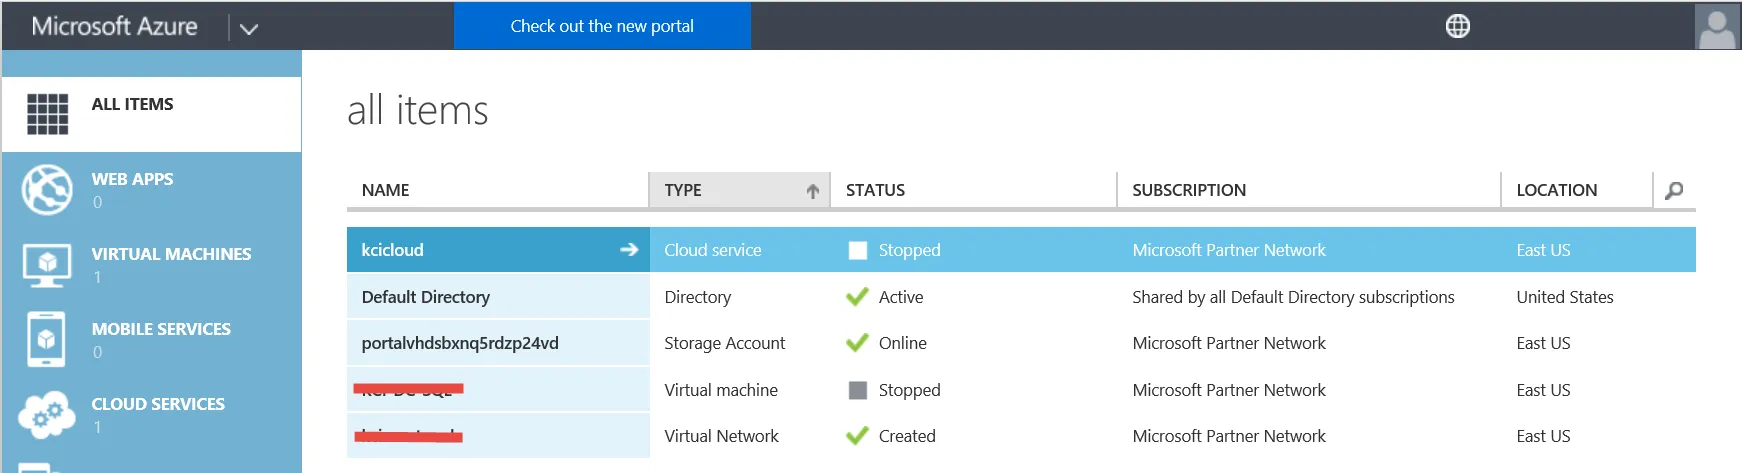
Here’s what the old portal looked like:
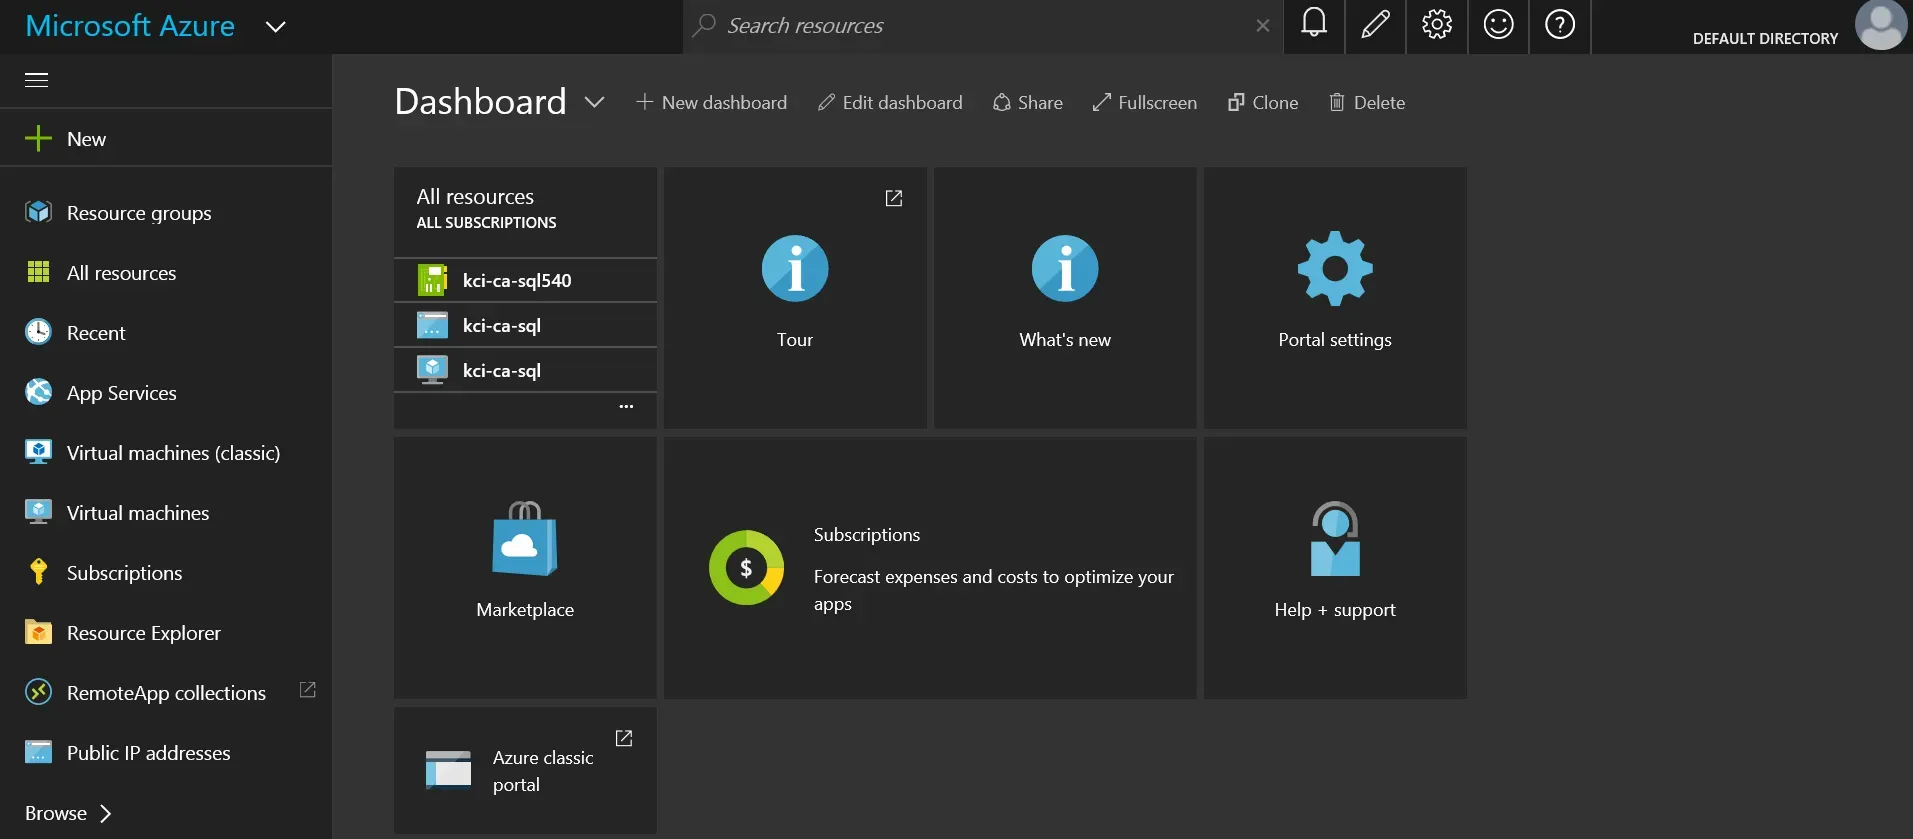
Here’s what the new portal looks like:
Initially, when the new portal was introduced, I merely thought this was a new dashboard-style presentation of the existing resources I had already deployed. Now that I have deployed some new resources via the new portal, I realize it’s a whole new API. Anything I have now deployed in the new portal under the “Resource Manager” deployment model is not visible in the “Classic” portal at all.
If admins use the new portal to deploy a new resource, they are given a choice at the very beginning now: select a deployment method, Resource Manager or Classic. Clicking on the help toggle shows this description:

This message was presented when deploying a new virtual machine, and the message may differ depending on what admins are deploying. This is the link to the additional information about the differences between the models.
Since I was starting with a new data centre different from my previous deployments, I went with the Resource Manager (default) deployment model.
Resource Groups vs. Cloud Service
With the Resource Manager deployment model, the walk-through of the different settings and options is slightly different than what I documented in my earlier blogs. The first big one is a change in approach to grouping resources.
One thing I blogged about near the end of my last series was where I missed setting something up that allowed future VMs to be grouped with it. I had missed associating my first “cloud service” with a virtual network so that future VMs would all be part of the same virtual network.
In the Resource Manager model, there is no cloud service terminology (that I’ve seen yet). On the first screen of a VM deployment, users are asked to select or create a new Resource Group and that is how resources are grouped. A resource group is associated with a region, so once that is set up, the location will default on all subsequent resource deployments. Depending on what users are deploying, they can change the location to something other than the default. The nice thing overall is it is a way to organize similar resources together to make the management of the resources easier. This was a lot more intuitive to me, as well as cleaner to view.
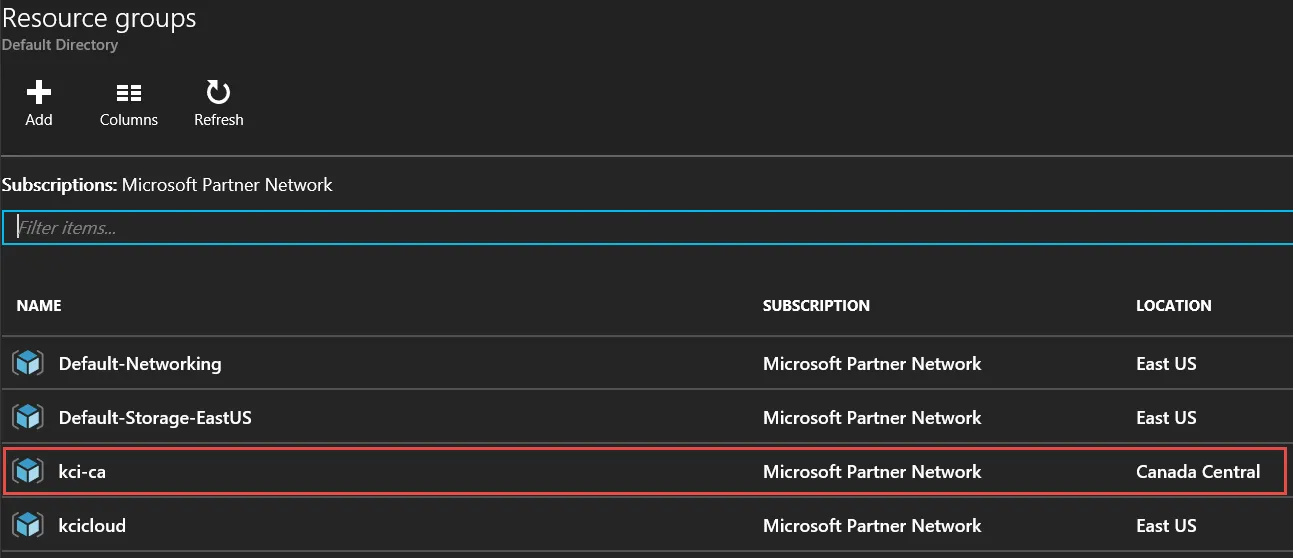
To illustrate this, here’s a screenshot of the “resource groups” I currently have, and 3 of the 4 of them are bits and pieces of the “classic” deployment model, where there wasn’t a choice (that I was aware of) to group the oddball pieces. I much prefer this “Resource Group” approach.
Deploying a VM under Resource Manager
Here’s a quick summary of deploying a standard Windows Server VM under the new deployment model.
Blade 1 – the basics
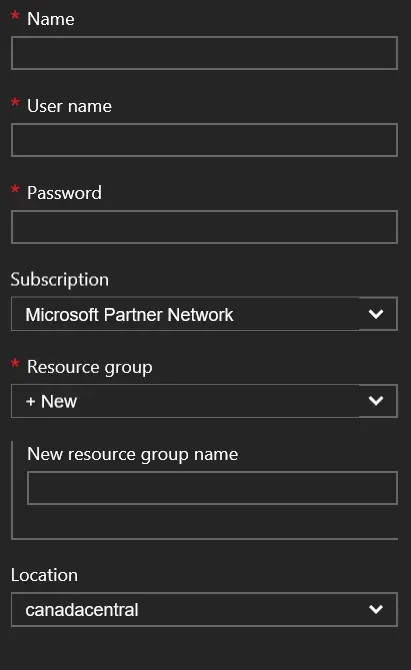
Each “option” or menu grouping is now referred to as a blade, in a lot of the documentation I’ve been reading. Clicking on a blade slides out the options for that area to the right. The first blade is simply the basic information – machine name, admin login and password, associating the VM with a subscription and a resource group, and identifying a location.
Blade 2 – Machine Size
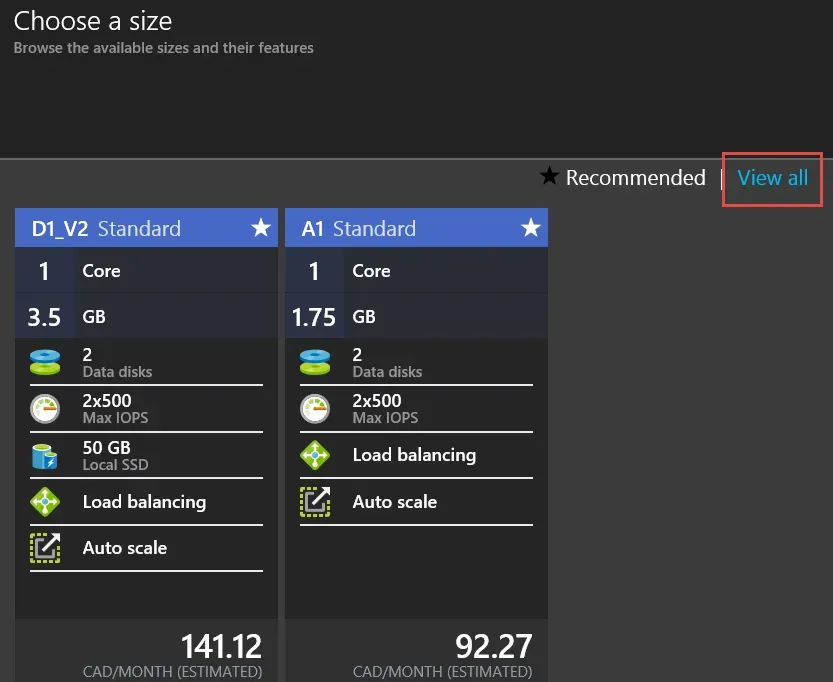
The next step is selecting a machine size. Watch for the list to be limited to “recommended” sizes initially, like the screenshot above. Simply click on View All to see all of the VM sizes available in the region you selected in the Basics Blade.
Note: not all VM sizes are available in all regions. Check this article out to see the various machine size options and what regions they are available in. This article is also a great resource on the capabilities of the various types of machines. Thanks to Neil Mackenzie for pointing that last article out to me.
My first VMs were A-series images and the newest ones I deployed were Dv2-series. Today I was working on both of my VMs, upgrading my GP 2015 VM to the latest service pack, to get that data upgrade-ready and on the other, installing GP 2016. Both of my machines have 7 GB memory, the old machine is a 4-core A-series, and the new machine a 2-core Dv2-series. Looking at the capabilities descriptions though, it’s easy to see now why the Dv2 machine blew the other one out of the water in terms of performance, even with fewer cores.
Blade 3 – Optional Features
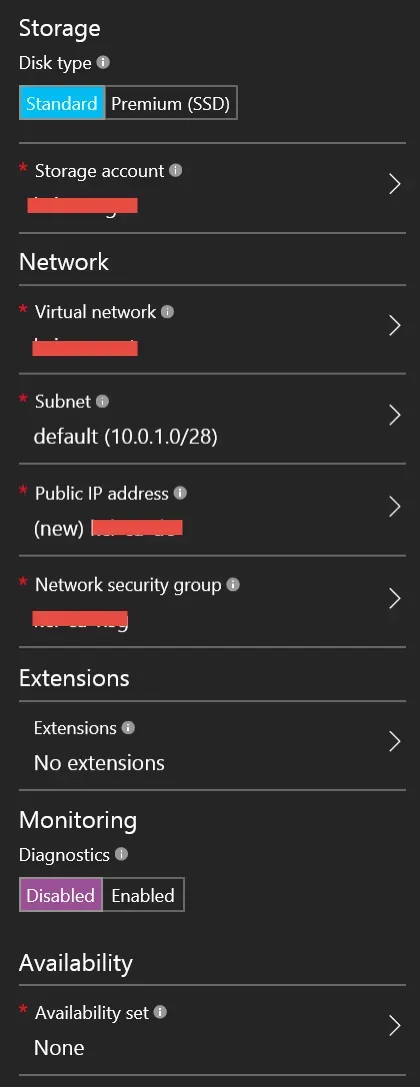
There are a couple of things here to note that initially were “gotchas” for me, that are different than under a classic deployment.
- Public IP address – to be able to access a VM from outside the virtual network, including RDP’ing to it to configure initial settings or things like that, it needs a public IP address. There’s more to this that I’ll cover in a second post, relating to configuration options of the public IP. Initially, I made the mistake of assuming I didn’t want to have one, and the Connect button to RDP to the VM is disabled when you do that.
- Network Security Group – under the Classic deployment, there was a section where one could configure endpoints, for different protocols like RDP or Power Shell. Now these things fall under network security groups. I haven’t exactly figured out the best practices here, and in my environment, I have created one NSG which both of my initial VMs use. The default is one NSG per VM if you accept the default settings. I guess I figure I don’t want to have to create inbound or outbound rules all over the place if I don’t have to. The downside of my approach is each machine has the same rules which may not be appropriate.
That’s it for now!