Today's #TipTuesday post is the last in my mini-series of SmartList tips for Dynamics GP. I'm going to walk through a very simplistic example of an export from an Account Transactions smartlist, to Excel, where a macro will do some basic formatting and create a formula for Net Amount.
The method I show below is just one way to do this, and it's a mini end-to-end example to follow about how to use this feature. The intent of SmartList Export Options is to automate repetitive tasks. This post is about how to automate part of the work done in Excel after exporting SmartLists. While the example is simplistic, the options are fairly limitless with what can be done with VBA in Excel!
Step 1 - get the Excel file ready
I start with exporting the SmartList I want to work with. I save that particular set of columns as a Favorite so that it's "fixed" (more or less!) and it's at the Favorite level that I will associate the macro to later.
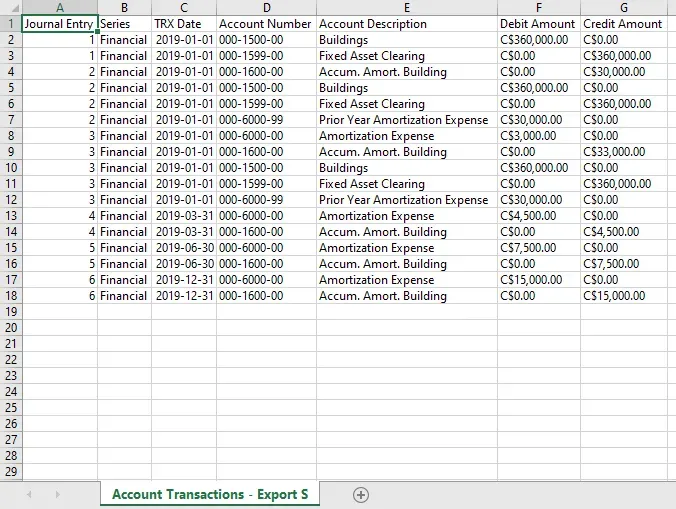
At this point, I have some data to work with to create and fine-tune my macro. For users not used to working with VBA, one way to quickly get something to work with is to plan out the steps, and then record the macro to get some of the commands ready.
My steps were:
- Rename the tab (optional, just one thing I like to do)
- Formatting - choose the font, size, alignment etc.
- Column resizing
- Number formatting
- Search and replace the C$ prefix on my dollar columns
- Adding a formula for Net Amount
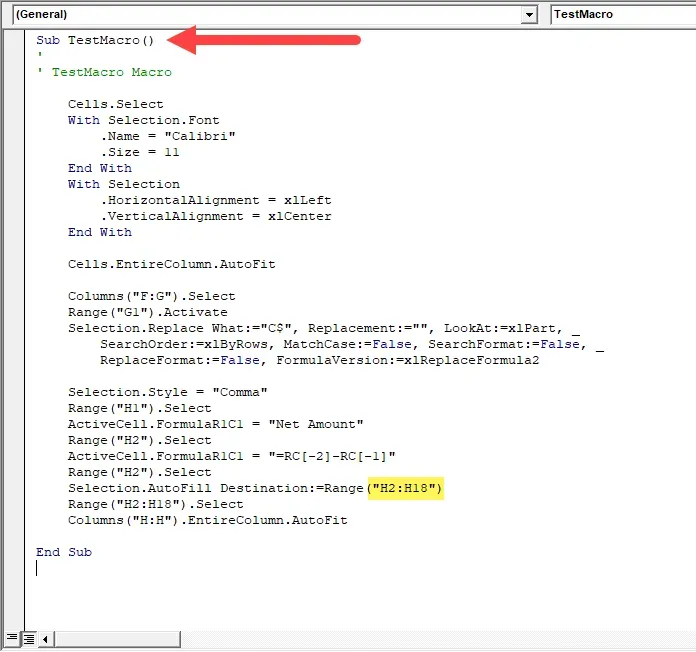
My macro recording looked like this code below (after some cleanup to streamline a few steps). The arrow shows the macro name. I chose to leave it as "TestMacro" but ordinarily I would give it a more meaningful name. This name - whatever it is - is what needs to be put in the Export Solutions window.
I've also highlighted an area that I would be fixing if this were real. It's a specific range of cells for copying my Net Amount formula. If this were a production macro, I would be changing this code to "find" the last row and copy the formula down so that it worked no matter how many rows of data were exported.
At this point, save this file somewhere as a macro-enabled file (.xlsm). If it's an Export Solution that others will use, ensure it is saved somewhere that is accessible by all users.
One side note: I usually test and re-test the macro thoroughly before moving on, using the original test data. Once I'm happy with how it works in Excel, the rest should be easy!
Step 2 - Export Solution setup
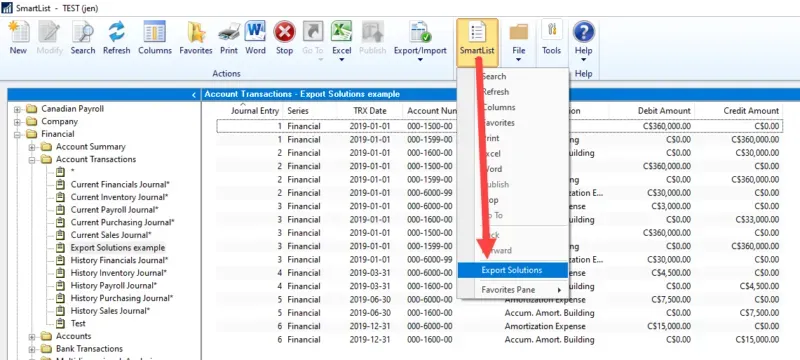
Now that the macro is working, go back into Dynamics GP and SmartList. Click on the SmartList button on the toolbar > Export Solutions.
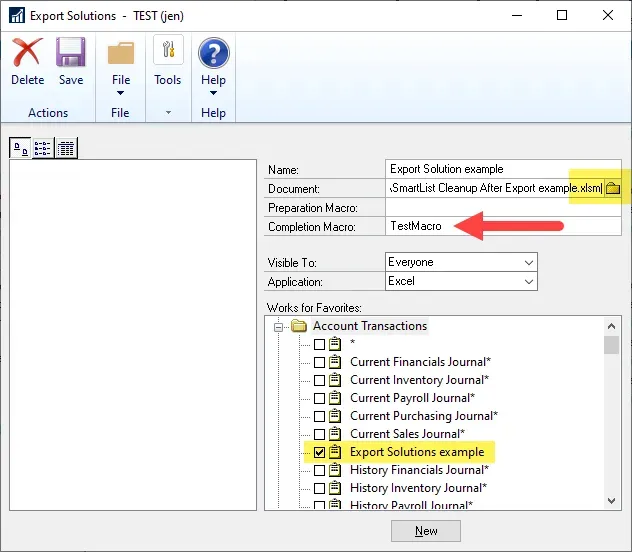
In the Export Solutions window, click on New at the bottom of the screen.
- Type in a name and note: this is the name the user will see in the Excel drop-down menu in SmartList.
- Browse to the Excel macro-enabled file.
- Enter the name of the macro for a Preparation Macro if there is one. This would be a macro that needs to run before exporting the data to Excel, such as clearing out a pivot table.
- Enter the name of the macro for the Completion Macro. In my example, the VBA macro name is "TestMacro".
- Select a Visible To setting - everyone or yourself only.
- Choose the application - Excel or Word
- Browse through the SmartList objects and mark one or more SmartList Favorites to associate with the Export Solution. The only caveat is to ensure that the favorites all have the same column layout (or, more specifically that the macro would run properly on all of the selections). In my example I'm adding a formula so I need something with F & G as Debit and Credit and then H empty to put in Net Amount. Columns A to E technically could be anything else, and it would still work.
- Click on Save and close the window to test it.
Using an Export Solution
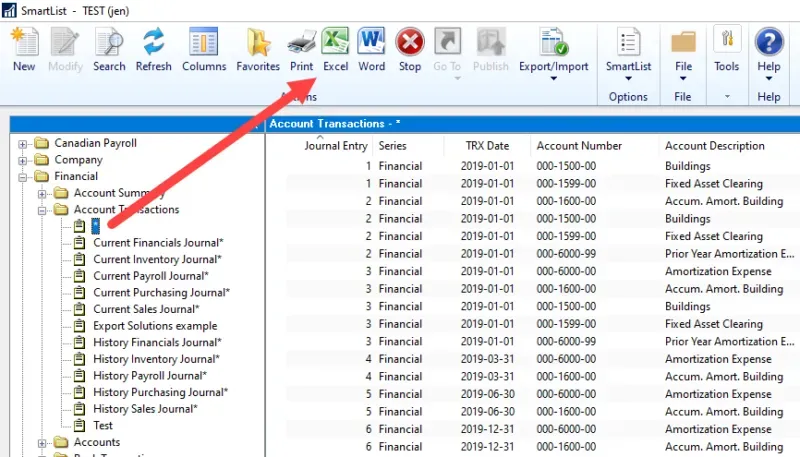
If a user selects that SmartList object (Account Transactions) but doesn't select a favorite that was assigned to an Export Solution, the Excel button is normal, like the screenshot below.
If the user selects a SmartList favorite with an Export Solution built for it, the Excel button will appear as a drop-down list, like this screenshot below.
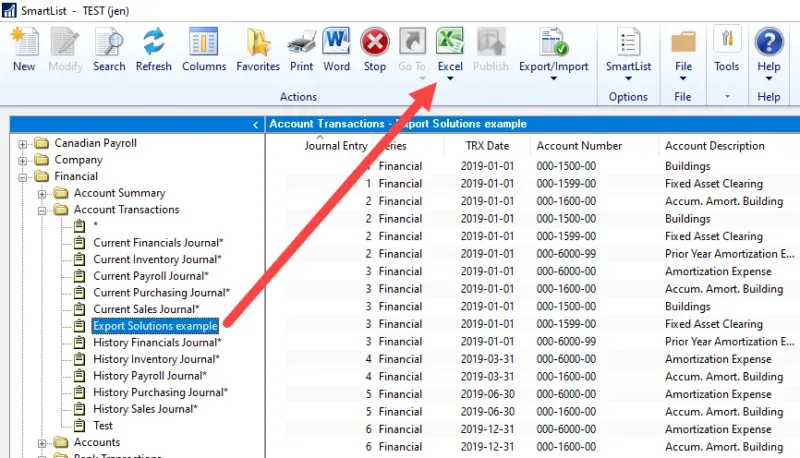
Now clicking on Excel doesn't immediately export anything, the user must select either Quick Export (the default non-macro-enabled export) or one of the Export Solutions. I only have one Export Solution on this favorite, so I see 2 options in the drop-down list - the Export Solution and Quick Export.
Note that the name is what I called this from the setup window above so in a practical use, calling it what I did would not make sense; it would be better to name it something indicative of what the solution looks like when I'm done. "Export with Net Amount" or something like that…
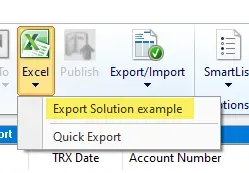
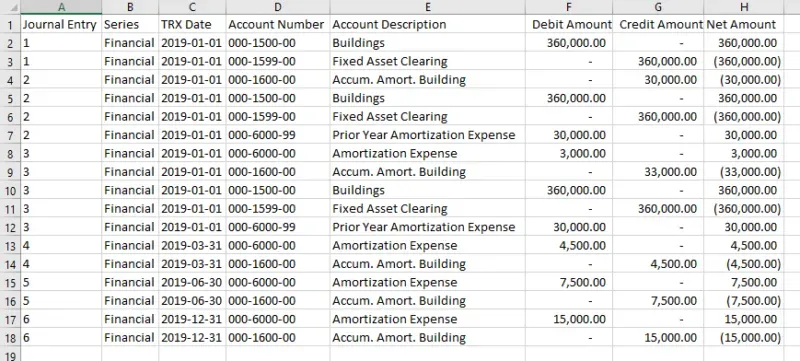
If I select that Export Solution example, Excel does its thing and immediately runs the macro. If the macro is small enough (fast enough), it's so quick that a user won't see it working, so it should be tested with a different set of data than what the macro was mocked-up with - i.e., filter the data differently to have more or fewer rows of data than what was started with, to make sure it works.
Here is what mine looks like after export, basic, but a good example to follow to practice this!
Summary
There are lots of things a user can do with this functionality and it's fun to play with scenarios. For a client, they had a process where they exported a certain SmartList, formatted and sorted it a specific way, subtotalled the sheet, and created a pivot table for it. We recreated that in an Export Solution and while it doesn't save hours per use, it saves minutes every time they export that particular set of data which adds up over the year. It's a straightforward time-saving or automation tool that anyone can build right away.


