The next in my series of blog posts about Report Writer is a brief article on Custom reports.
Why create a custom report in Report Writer? (really… why?) I’ve done it a handful of times, and don’t particularly recommend it (with all due respect to David Musgrave 😄) but there are a couple of simple reasons why it makes sense sometimes. The types of reports to create with it would need to be extremely simple due to the fact there is no end-user option for sorting or filtering results and no parameter input.
- Data Validation. It can be useful to put together a report to quickly view some records that are otherwise not available on a regular out-of-the-box report. This is usually why I use it, and the reports are generally discarded after we’ve validated and printed what we need. This is my last resort, as Smartlist Builder is my tool of choice for this. However, if the customer does not own SLB, sometimes this is the next best option.
- Time. Sometimes the alternative is another reporting tool, which needs to be purchased, licensed, installed and/or configured; not to mention the matter of distributing the report to the necessary users. Sometimes, if the report is possible using Report Writer, it’s quicker and simpler to do it this way. There are so many tools out there, but most of the time the best option for the long term is another reporting tool (Crystal Reports, SQL Reporting Services, Smartlist Builder, etc.). There simply is not enough flexibility with Report Writer to do all the things many people want to do with reports but the one thing it has going for it is it’s always there ready to go when needed.
How to create a custom report
I’m not going into as much depth on this article simply because I don’t expect many people to actively use Custom Reports… it’s a high-level overview of the steps and my previous articles can help with some of the nuts and bolts of the details.
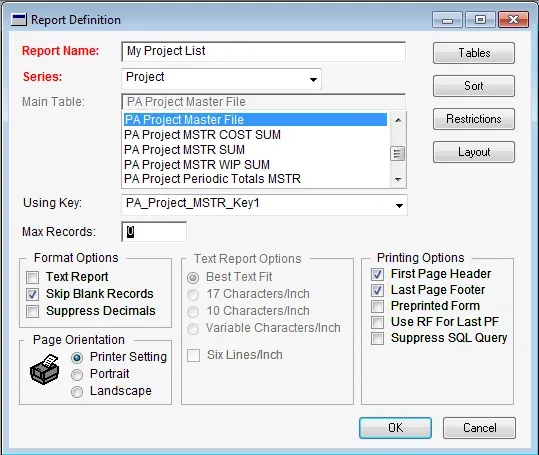
- Launch Report Writer & select a dictionary. Open the Reports window if it’s not already opened and click New to get started. Give the report a name and select a Series for the report. The Series will affect a couple of things, most notably where the report appears under security when setting security for this and where the users find it in the Custom Reports window. Keep it simple: put it in the series that most closely fits!
- Select a Main Table & Keys. The main table is the one where the primary source of information is located. I’ve selected “PA Project Master File” since my example will be a simple project listing. Most tables have multiple key options, and the best choice may be different depending on what is being linked to, how the report should sort and what sections should be on the report. In my case, I am not sorting or grouping by many fields so the first key – Project Number – is fine.
- Add other tables as needed. Add whatever other tables need to be linked to this report. If necessary, create a new relationship between the two tables. For this example, I’m simply linking to the RM Customer MSTR table to get the full customer name on my report.
- Add sorting and/or restrictions if needed. My next blog article will talk about both Sorting and Restrictions as well as Keys. For my example, I’ve left both sorting and restrictions blank. Here is what my Report Definition looks like:
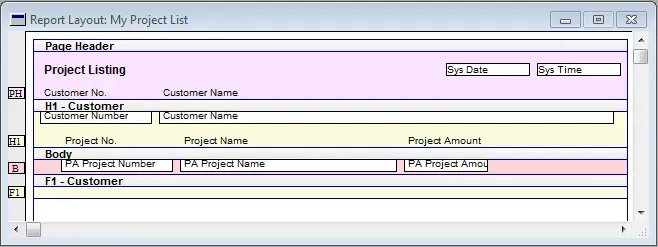
- Create the report layout. It’s a blank slate here, and report writers can create whatever sections are needed, decide what page headers and footers they want etc. In my case, I’ve decided to add both a header and a footer section for the Customer. My report is going to be a list of projects grouped by customer, so my header and footer are breaking on changes in Customer Number. Here is what my simple report looks like in Report Layout:
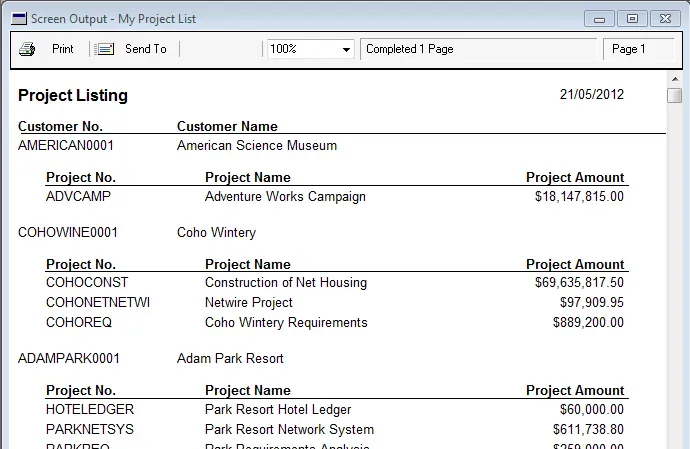
- Test the report. With a custom report, it can be run right from within Report Writer which helps a great deal in checking the data and layout quickly. This is what my simple report looks like:
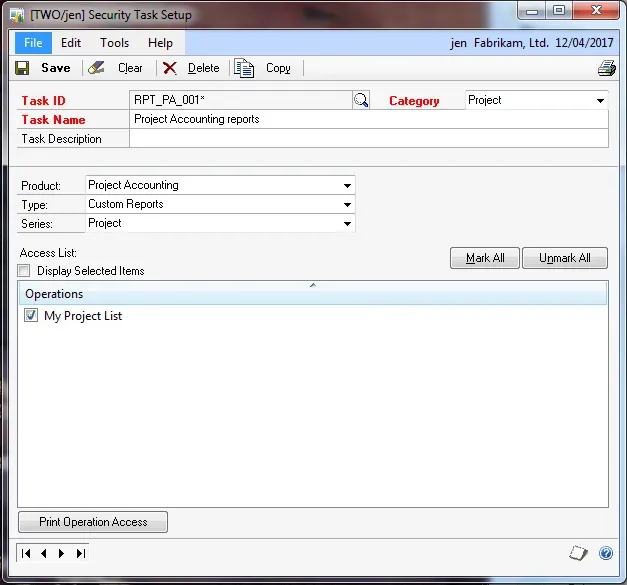
- Set security. Security on these types of Report Writer reports is not through the Alternate/Modified area like one would use to grant security on a modified report. This time, it’s in the tasks. Edit or create new tasks where the report needs to be visible to certain users. Select the product under which it was created, the type is “Custom Reports” and the series is whatever series was selected when creating the report.
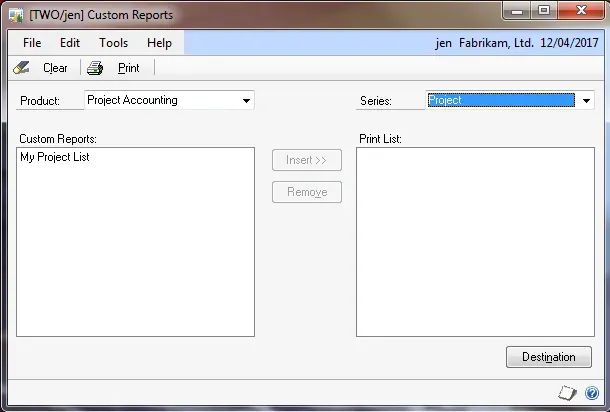
- Print the report. Lastly, custom reports all appear under one window under the Reports menu, Customized and users select the Product and Series to display and print them.