Picking up from Part 1, now we are getting into tips and tricks for modifying reports. I am walking through a specific example of taking a report that was in text format (General Posting Edit List), converting it to a graphical report, and then modifying it to make it better looking!
The starting point
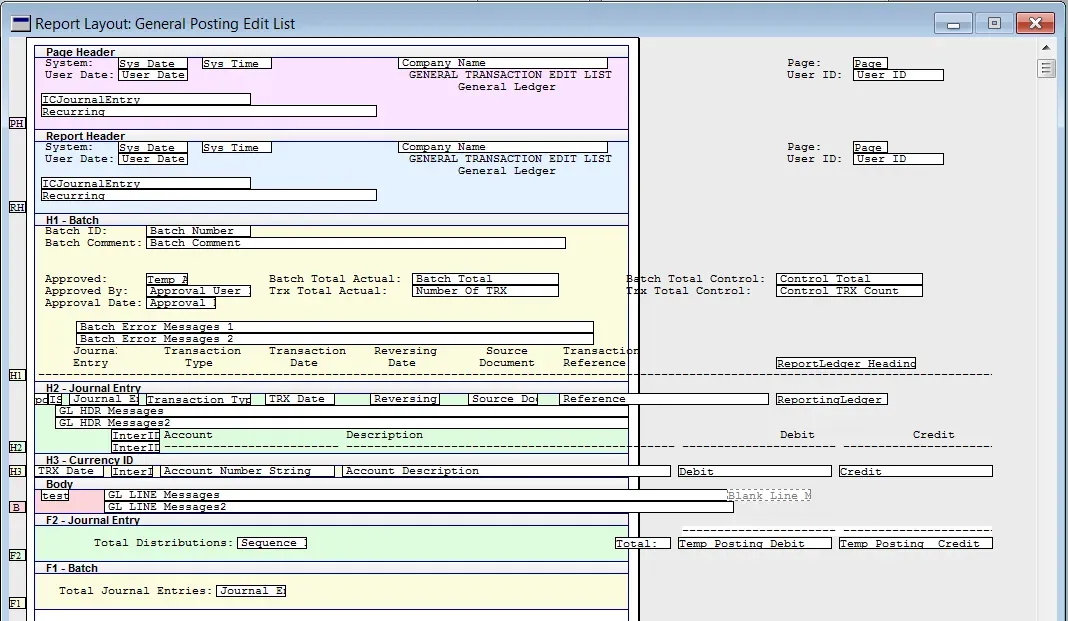
Here is where I left off the last post, with the report layout simply with the Text Report checkbox unchecked. The fields that were on the right side of the layout before now appear off the page.
Altering fonts & moving fields
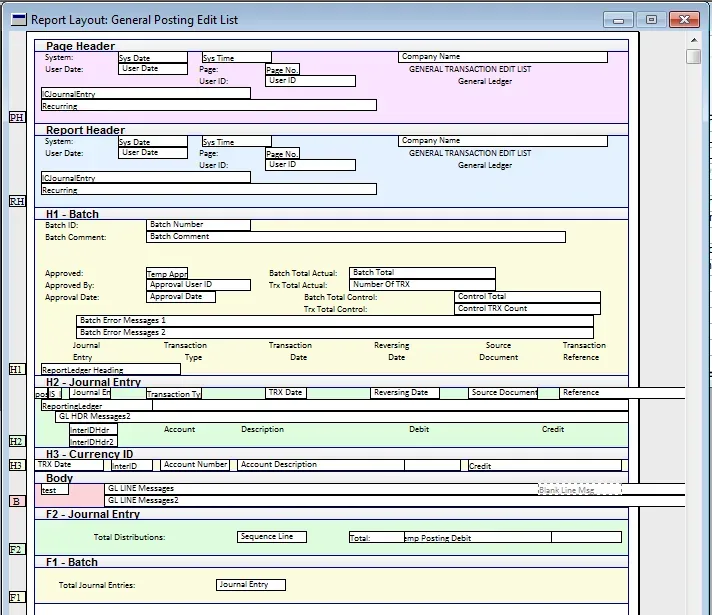
My first step was to select all (CTRL+A) and then go into Drawing Options (CTRL-D), to change the font from Courier 11pt to Calibri 9pt. I figured that 9pt gave me a reasonably-sized font for reading the report and fitting things into a portrait page layout.
Second, I dragged all of the fields that were “off the page” to within the page boundaries as well as making a few field size changes. Notice even though I’ve moved my fields, there are lots of fields that aren’t in their final spot yet, such as Page Number and User ID fields in the headers.
Fine-tuning the layout
Next, I began to fine-tune things. I’m taking advantage of the Arrange tab on the Toolbox. I’ll describe these tools in more detail in my next post. What I use all the time are the Align and Size tools. When editing reports in Report Writer and manually lining fields up, that’s not a good use of time! Keep reading and use the Align tools and Size tools to quickly and easily line things up and make field-size changes easier by matching other related field sizes.
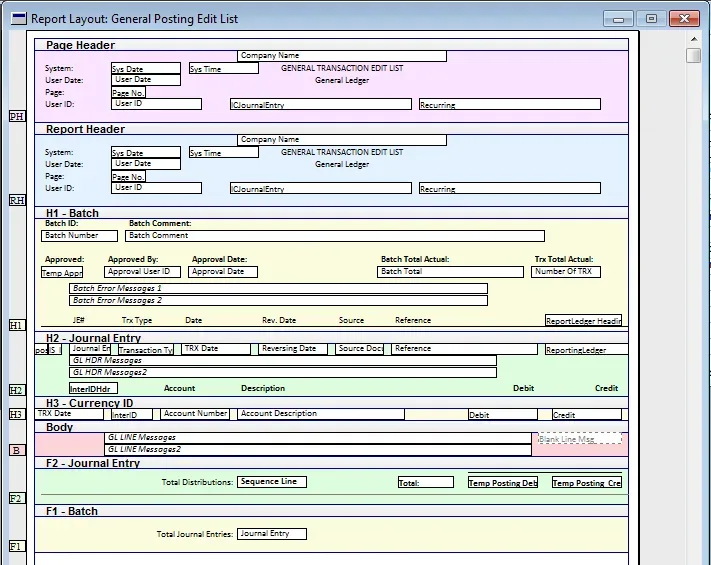
So, I started to fine-tune by rearranging the fields to fit things into where I wanted them. I moved some of the “legend” fields in the headers to make room for the Page # and UserID. Using Align features, I lined up the fields with the other Date/Time stamp fields. I re-arranged the H1 fields (first header, below the page header) to present the information in more of a tabular format (headings above the data). I also made the titles of these fields Bold to make them visually different from the data. Re-arranging the data this way allowed me to save a bit of space and reduce the overall size of the H1 section. This doesn’t make a huge difference but overall reduces paper in the long run, with more information fitting on the page.
I added a black thin line under the primary heading titles (Journal Entry #, Transaction Type, Date, etc.) to visually separate the body from the headers. I also added a medium grey colour thin line at the bottom of the F2 section, which is the end of one journal entry. This will visually separate the individual transactions without it seeming too much like a big grid of lines.
On the titles for the body data, the original report had two text fields for a two-row heading/title. I preferred to save space, came up with shorter titles and eliminated one row of unnecessary text fields.
Last, I changed the error message fields to italic – that way if and when they do appear they may stand out a little more than if they are the same font style as everything else.
Here is what the layout looked like after the fine-tuning:
A caution on removing fields and sections from a report
On many reports one may want to modify, often there may be LOTS of unnecessary fields. The default reports have a lot of data on them, primarily because every business has slightly different needs. Since modification is fairly easy, it’s up to the organizations to tweak reports as needed for their specific uses.
One thing to avoid is a wholesale deletion of fields. Why? Well, there are two reasons I can think of.
- The field may be required by Report Writer for some reason.
- One never knows when they need that field back!
Taking a close look at a sample of reports, there are a lot of already-invisible fields and some yellow invisible fields plus other legend-type fields that only appear when certain criteria are met. Often these are calculated fields. If there are fields that are purely data fields that aren’t needed, first try to hide them by going into Field Options (CTRL+F) and making them invisible. Some fields are safe to remove, some are not and unfortunately, it’s something one gets a feel for over time after modifying many reports. This is my simple guideline (not a hard-and-fast rule though!):
- Text fields are usually safe to delete. By “text field” I mean a field that can be edited with the “A” text editor tool.
- Data fields are also generally safe to delete BUT if I don’t know what it is, I don’t delete it. By “data field” I mean a field from a table or global field that was dragged onto a report.
- Calculated fields I often watch out for, normally are there for a reason! If I don’t know or can’t figure out the reason behind a calculated field, I leave it alone. Better safe than sorry. If a field on the report is ALREADY invisible, don’t delete it – again: it is there for a reason.
Now what do I do?
Start with making a field invisible and hiding it behind another field in the same section. Don’t drag a seemingly unnecessary field from one section to another section; if it’s a meaningless field that won’t matter but if that field is used for some reason, moving it to a different section of the report could alter how the report generates and cause other issues.
Sections work similarly, if there is a report that contains a lot of sections that aren’t wanted, make a backup of the report before taking a section out first so it is possible to go back to a previous iteration if necessary. Many times the sections may not make sense, but they are grouping, totalling, or otherwise summarizing data at a certain level that may not be relevant to the organization. Most data on reports falls into a “one-to-many” table relationship scenario so moving a field from one section to another may not result in the right result.
When removing a field or section, try to back up the dictionary or export the report to a package file first, then delete the section and then test it. If all seems ok at that point, it may be safe to proceed with the changes. After deleting a bunch of things then continue making other changes, and realize there is an issue later, it’s harder to narrow down exactly which field removed caused the problem.
Ready for testing
Once I feel I am nearly done with a report, it’s time to test it out. I test at different times, depending on the kinds of changes I am making. On a report such as this where the majority of the changes are cosmetic, I will make the majority of changes first before switching back to GP to take a look. It’s a different story if I am creating a lot of formulas, adding a lot of new fields or otherwise changing more than fonts and styles; in those cases, I don’t wait too long before testing a formula out. I don’t want to get too ahead of myself if something isn’t working, the further ahead I go, sometimes the harder it is to determine what went wrong.
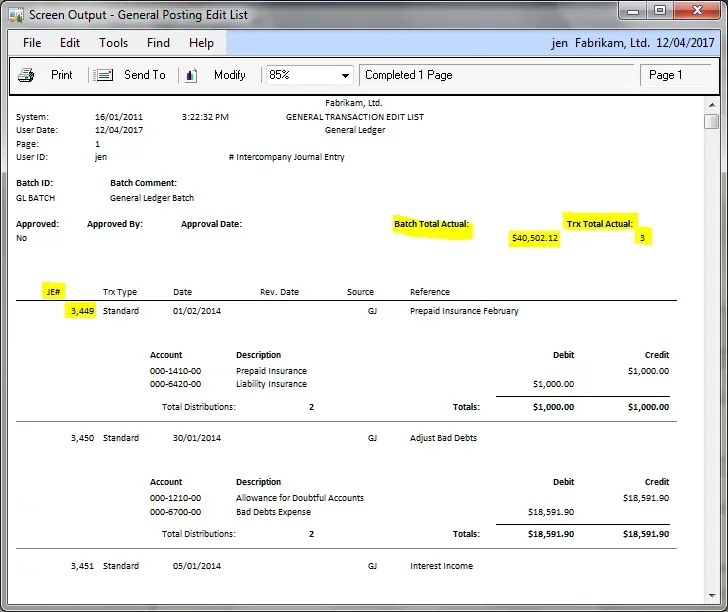
Testing highlights a lot of things that I can’t see in the report writer interface, such as text field alignment. Here are some examples of what I may find if I am close to done. I’ve highlighted a few issues with field alignment, where it’s hard to see what the field is for, it is so far removed from the title.
A quick note on security for testing
As with previous recommendations, make backups AND edit reports either without others in the system or on a copy of the live reports (with no one else accessing them). If re-modifying an existing report, there is less of an impact because security, in theory, has already been set up and the “production” dictionary already has “a” modified version of the report in it.
The challenge is when modifying a report for the first time, being careful how to set security and test. In this scenario what I recommend is to grant security only to yourself on this newly modified report. Until a report modification is in the current, active production dictionary, don’t give security to other users otherwise they may get errors if they try to run that report before the report is complete. If you (as the author) forget to copy the report into production, and then get an error, you will know what the issue is. The ultimate I believe is to give yourself access to this modified report only in a test company so that scenario doesn’t come up.
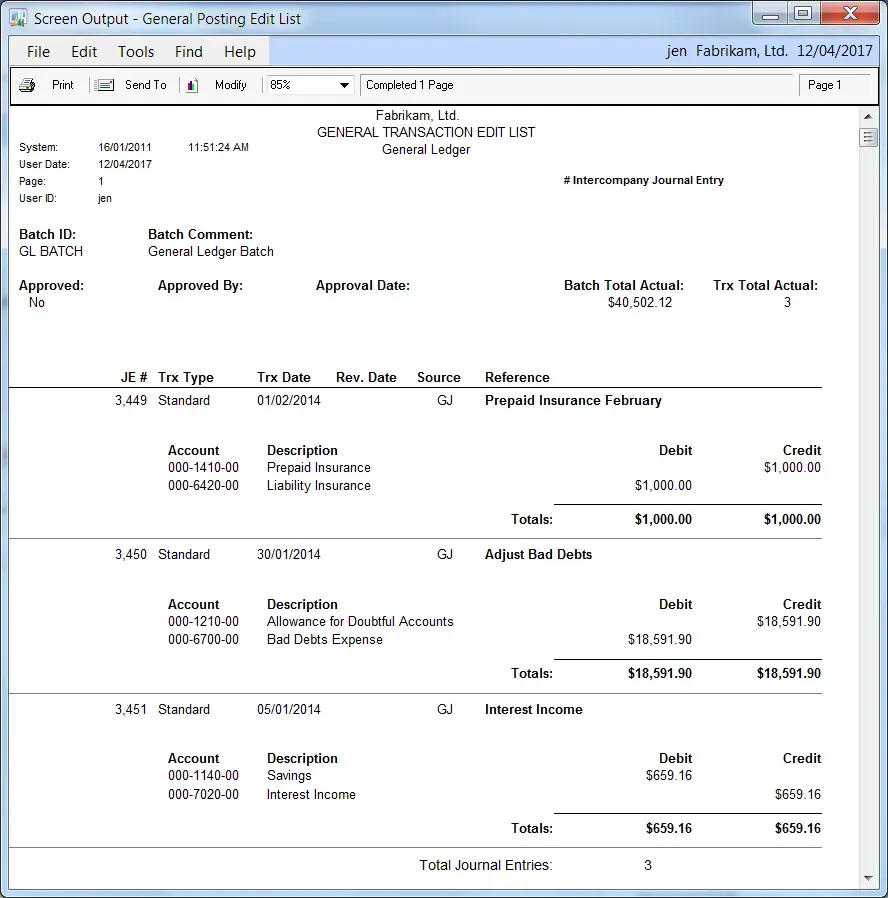
The report is complete!
After making some of the highlighted changes and a few other minor tweaks, my report modification was complete. The last step then is to arrange to bring it into my production reports dictionary and grant security to the appropriate users. All told, this was a simple report modification and it took probably an hour or so to complete the changes. Here is the final report output:
Next post I will dive more into some of the specific tools in Report Writer and continue to “demystify” Report Writer!